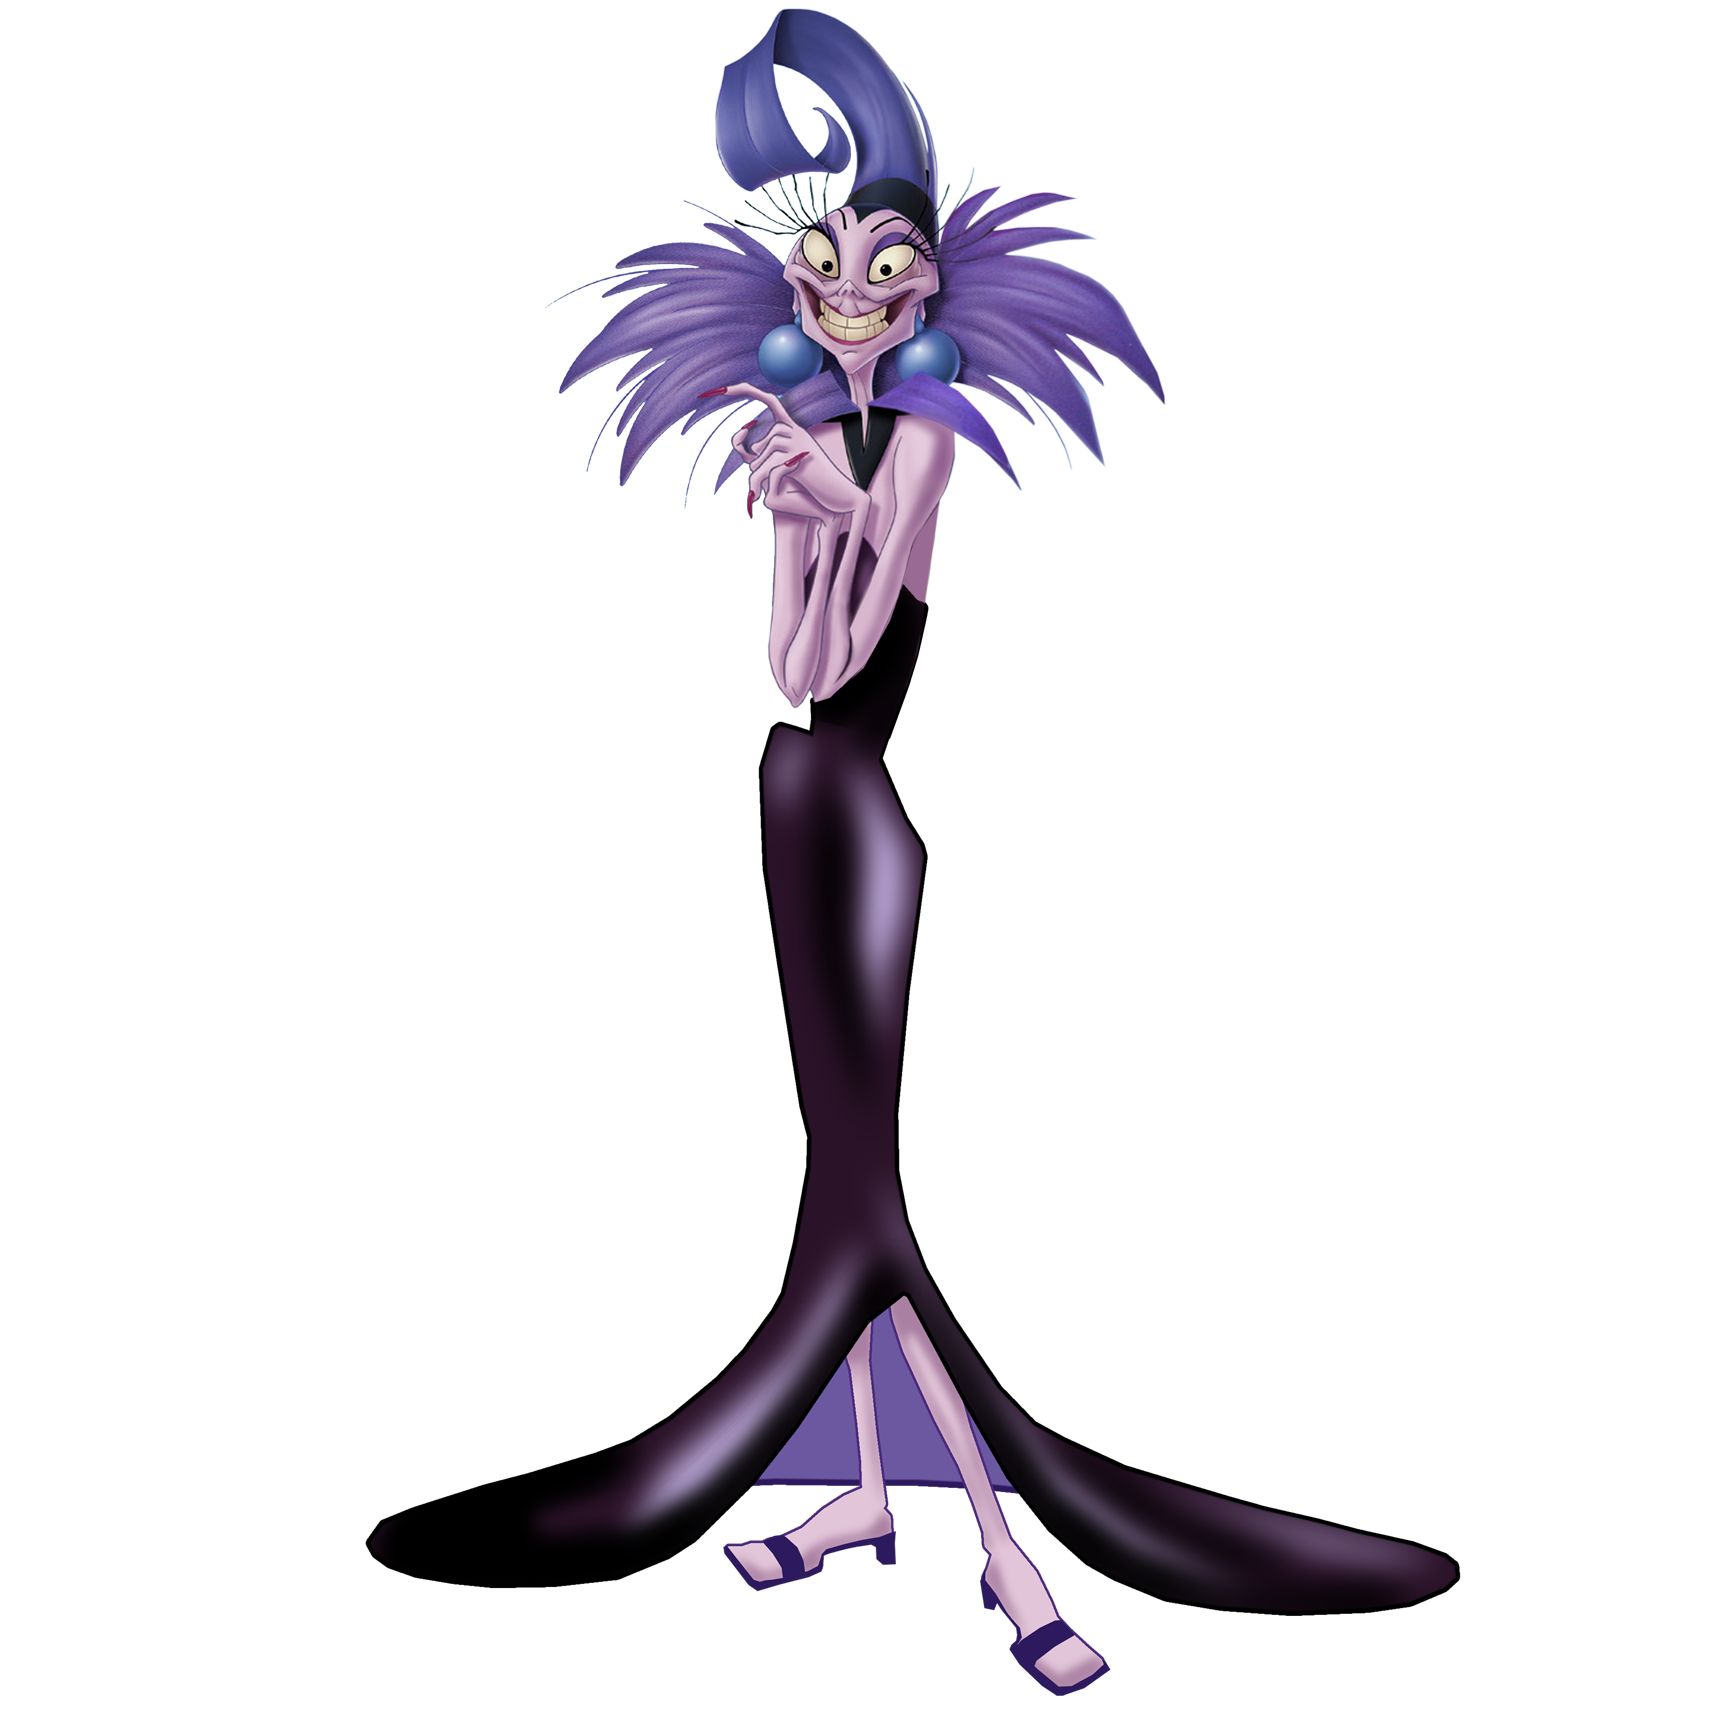
Yzma from Emperor's New Groove


For my "real world" job I work in a retail store. Around the time a convention starts or Halloween is coming, I get asked a lot for a specific piece of clothing to match a costume. This always leads me to talking to them for a few minutes about their costume. The most common thing that they tell me is that they don't have a ton of money to spend but they want an awesome costume. I totally get this because I am on a tight costume budget as well.

But working on my Yzma costume, it made me realize that it is possible to make a great costume for under $50. With a little planning, couponing, and saving a little money here and there, it is totally achievable. So I thought I would start a series on making costumes for under $50.

For my last convention I needed a “walk around costume”. This is a basic costume that I can walk around the convention in that I don't have to worry about tripping in and is comfortable. That is where Yzma came into play. She was perfect and fun to walk around in (I may have had fun yelling at my Kronk pillow prop). I made everything myself for this costume with the exception of the dress which saved a ton of money.

Here is the rundown on what I spent on my Yzma costume. Most of the stuff like, like the wire and tape, I bought once and used it on the whole costume.


Dress: $10
Black maxi dress is from H&M that was on sale online.

Hat: $10
Hand made from wire, electrical tape, duct tape, fabric, and paint.

Necklace: $10
Hand made from feathers, wire, electrical tape, duct tape, and hot glue.

Shoes: $0
I had black flip flops on hand. But you can find cheap flip flops from anywhere.

Earrings: $4
Handmade from fabric, paint, and modge podge

Eyelashes: $10
Made from H&M eyelashes, feathers, and E-6000 glue.
See the tutorial here.

Earrings:$0
I had all of the items that I needed to make these. See how I made them here.

Total: $45!

There are a few options that you can add to you cosplay if you have a little extra money hanging around.

Potion bottle Prop: $3
I found a really cheap bottle at my local craft store and filled it with clearance purple glitter.

Kronk pillow prop: $6
I had most of the items on hand to make this pillow. The only thing that I bought was the stuffing. See how I made this pillow here.


Purple Make-Up: $25/$9
I did by make-up for this costume but ran out of time to put it on for the convention. There are two kinds of purple face paint that I bought. The first was Kryolan, the make-up of the professionals (heh). I did love this and it was the perfect color for my costume. The second makeup that I tried was Mehron, it is a little cheaper but just as good. The only complaint with this was it was splotchy. With some time and a helper, you can make this work.


Pro Tip: Planning is Key!

I didn’t come up with this idea overnight. If I did, it would have cost a ton more than it did. When you have an idea of what costume you want to make, you can dissect it and figure out what is going to cost you the most, by doing that you have a goal of how much to save. I knew going into this that my hat and necklace was going to be costly. So I saved my money in a jar and when the moment came when I had a great coupon, I got all of the stuff I needed.

Just remember, you can make a great outfit! Just believe in yourself!

Xo Amanda


I knew this was going to be an interesting challenge for me to make when I started to make my Yzma costume. Why you ask? Well, because I don't have my ears pierced and didn't really want to just for the sake of the costume.

There are of course many different options for me to go about using earrings without having them pierced. The most popular option will be the classic "clip ons". I have had to use these in the past for some of my shows and I loathed them. The next option would be magnets. I had a pair of magnetic earrings and they worked out pretty well. The problem with this option for me was that it was going to break my budget of $50 for this costume.

So what is a girl of my little means to do? MAcGyver it!

The weapons of choice: White fabric, acrylic paint (blue, white, and black), modge podge, and..... spirit glue(not pictured).

Like most theater actors I had some lying around in my makeup kit begging to be used. And why not? That stuff can hold up the Empire State building if you had enough.

My process was simple. Cut out circles in three different sizes from the white fabric. Attach them together using needle and thread. Then to create the 3D effect, I just used layers of paint in different shades going from dark to light. To make the fabric stiff enough to stay straight I used mod podge on the back. Then presto! Awesome non-hurting-clip- earrings are made!


 The best part is I didn't spend any money on this because I had all of the items that I needed. I am all for not spending money if I don't have to.

Side note. Convention is less than two weeks away! *cue Pointer Sisters song* I'm so excited!


Good news! I am almost done with my Yzma costume for the Convention. Body paint has been bought and tested, feathers have been glued to the necklace, and paint has been applied to the hat. Last thing on my list was to make Yzma's signature lashes. As seen here:
Pretty epic is it not? So how was I to go about getting these?

My first thought was to buy the lashes through my favorite site Etsy. There is litterally everything that you can ever need on that site that I made by the average joe. So I did find some that I thought matched perfectly. 
Find them here
My problem was that I wanted my Yzma costume to be under $40 and buying these would have made me go over my budget. My solution? Make my own. 

I found these fabulous lashes at my local H&M on sale for $3! I was super happy about this. Normally they were $6, so it wasn't too bad. I am sure your local Walmart or Target will carry great lashes for cheap. Then I found these great feathers at my local craft store for $3 as well. As you can see, they were apart of a bundle with other colors. So I just took them apart and used the black ones.

Next step was to glue the feathers to the lashes. My glue of choice is E-6000. 

*Que the heavenly music* I love this stuff! I use it on everything that you can think of. One of the reasons that I like it is because the glue is flexible and long lasting. Its great on fabrics to glass. My local craft store carries this. Its about 8$ but I had a great coupon that brought this down to $3. It was well worth it because I have had this for 3 years and still have most of it left.

Using a sewing pin, I just took a dab of the glue and pressed it along the lash corner. I only went to the center of the lash because I didn't want the weight of the feather all on my eye. The next part it pretty simple, I just took the feather and pressed it against the glue.  Hold it there with the pin (or your finger) for a minute or so. Let the glue set overnight before you attempt to try on your lashes. I know for me it was a long wait. I so wanted to try these on right away.


And here is how they look after you let them dry overnight. The real magic happens when you put them on.


 They turned out exactly how I wanted them too! The best part is that I only spent $6 (excluding the glue) on these and I stayed in my budget for my costume. I can't wait to see these with the rest of the costume.

Oh and don't forget to buy lash adhesive for these. My lashes came with glue so I don't have to worry about it. Walmart sells this glue for about $2, so don't sweat the price!


One of my costumes this year is Yzma from The Emperor's New Groove. Sadly my sister did not want to dress up with me as Kronk or Kuzco (I'd even offered to be the guy so she can be the girl). I did feel like I wanted a prop to play with in my character. So I decided to make a plushie version of Kronk and say he took a plushie potion by accident.


May I present Kronk, the plushie!
 

I feel like I should start a series calle "Places Kronk Should Not Be". We will see how this works out.

Tutorial to make your own Kronk coming soon!


Here are some past photos that I have taken of the progress of the costume. Some of them are not pretty. Consider that your warning.


This is the costume that I am making. As you can see, there are lots and lots of feathers which should be a ton of fun to create. The main challenge in this costume would be the headdress that she is wearing. I wasn't sure how I would go about making it curl. 

The very first thing that I did was working on the collar of purple feathers. I made the base out of wire so that I can get the point in front. I couldn't find long enough feathers to make it flare out, so I just attached three feathers together.


Progression of the headdress.  As I mention before, it was going to be the most challenging aspect of the costume. I made a wire form for the hat and swirl. Then to add strength to the whole thing, I covered it in duct tape.  The purple is just painted fabric to match the fabric.