Mary Poppins

I am sure many of you have seen a version of this cosplay all over Pinterest. Why not? Its from an amazing childhood movie and it looks awesome. Not to mention that I love to bring out the English accent whenever I can. So I bring you my Mary Poppins cosplay for under $50.


White Long sleeve shirt: $0

But you can find one at a thrift store for $7. Preferably get one that buttons all the way up to your neck. In my case, I had to pin mine to make it look like this.

Black skirt: $0 

I had this skirt hiding in my closet, but you can find one similar here for $13 

Black tights: $0

I always have black tights on hand, but head to your local clothing store for some $10 tights if you don't own a pair.

Black heels/boots: $0

I had the perfect pair of heeled boots that fit for the costume. Any black shoes will work for this costume.

Red belt: $1

I just visited my local craft store for basic red ribbon. They luckily had one for a buck that was the width I need.

Hat: $6

I made my hat for under $6 (not including glue and things like that). Visit this post to see how I made the hat.

Bowtie:$13

Believe it or not, this was the most expensive part of my costume. I am sure you can find a red bowtie out there ( Thanks to Doctor Who for making them popular). But if you can't, follow our bowtie tutorial to make your own. 

Total:  $20
Without everything I already own:$46


Not bad huh? I was able to pull this together for a last minute costume event that I had that night. Now who wants to go watch Mary Poppins with me?

xo Amanda


For my latest costume, as Mary Poppins, I needed her iconic hat. There we many issues that came up with this for me. One being that my head is larger than most and two that the hats were too darn expensive my my budget. Thus the wheels in my head began to turn.

In one afternoon, I was able to create this hat along with the bowtie for my event. Here is my process of making my hat.

Supplies:
4 Squares of Black Felt ( the cheap ones from the kids crafts)
Cardboard or other heavy paper
Fake Daisies and cranberry- not pictured in my hat
Hot glue gun
Scissors
Pencil
Bowl or anything that is a circle that fits your head
(Optional) Hair combs like this one .

Step one: Top of the hat


On your cardboard, trace around the edges of your bowl.


Then add about a half inch to the edge for the clipping. Cut out your pattern and trace onto your felt piece. Glue the two pieces together with your glue gun.


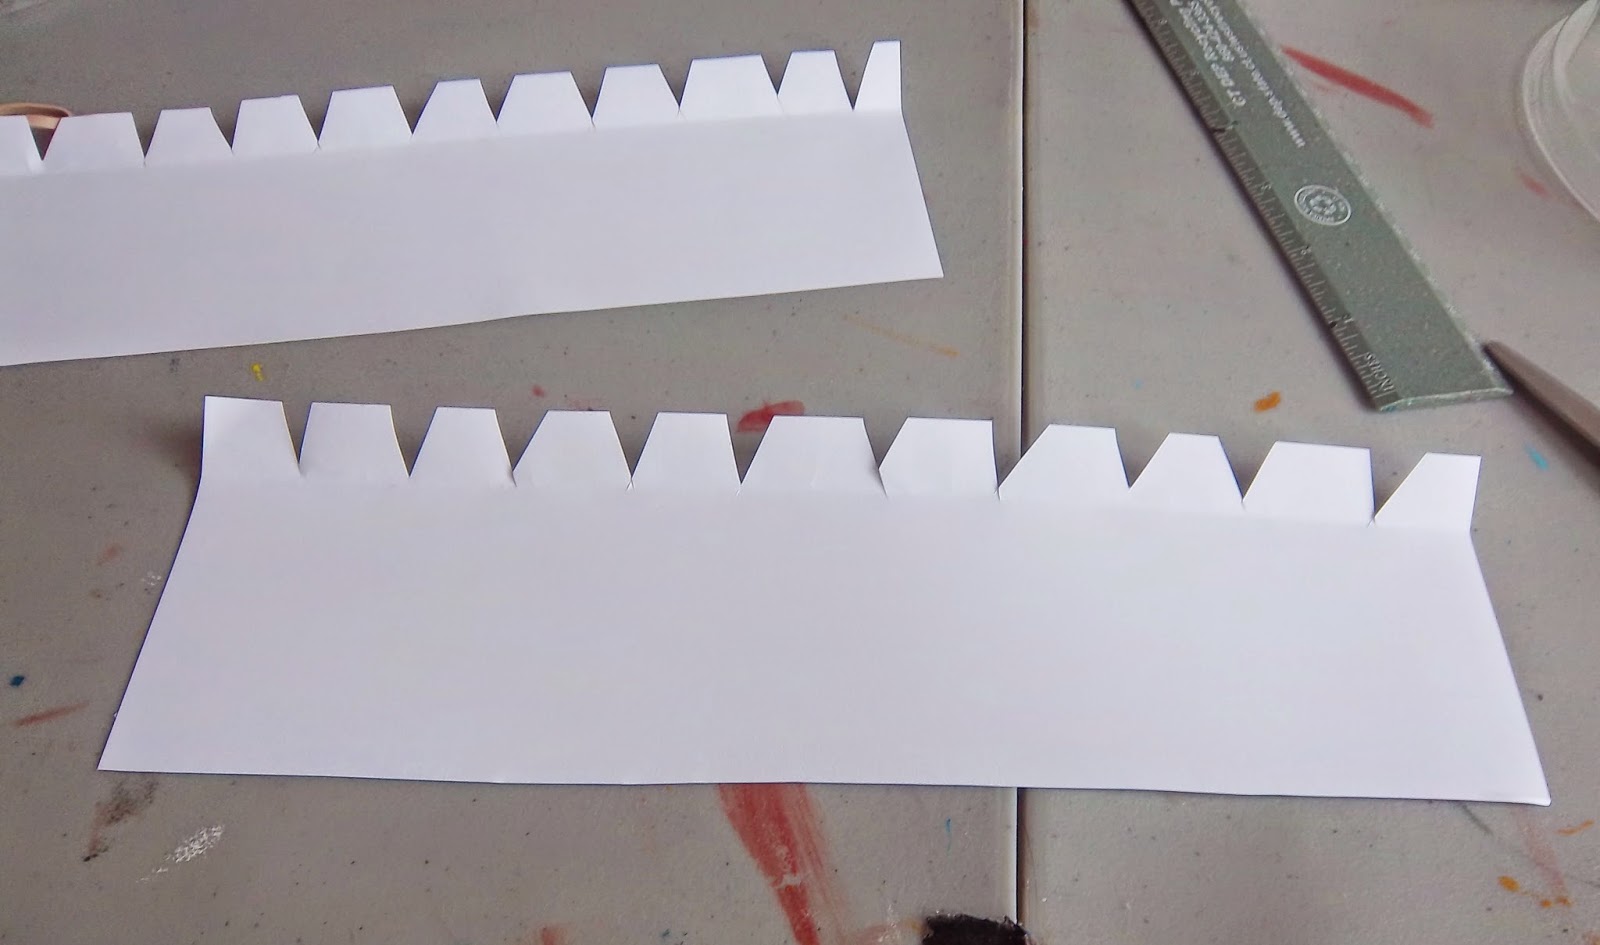
Clip around your edges in a v formation.


Step 2: The band


Measure out a strip that is 2 1/2 inches high and the width of your bowl ( mine was 12 inches). Trace and glue to your felt. Clip edges on the horizon lines like you did for the previous step.


Step 3: The brim


Taking your bowl once again, trace around on your cardboard. Now add 3 inches to the circle to create the brim of your hat. Cut and use as a pattern for your felt.

Make sure to cover both sides of the brim because both will be visible from other people.


At this point in the project, my felt was not large enough to cover my brim. So I was able to piece together my felt with relative ease. I just made sure that the seams were either on the side or on the back so that they wouldn't show.


Step 4: Putting it all together


By now you should have your three parts of your hat all covered with the black felt. It is time to assemble your hat.


I started off with the top part of the hat by folding up all of the tabs that you created when you made the V cuts. Glue all of these tabs down to the base of your cardboard.

Fold up the tabs for the band of your hat.


 This is where it is going to require some finger yoga techniques. Glue the band's tab to the tabs that you just glued down.


It should look like this by the time you have glued everything down.


Next it is time to add your band to the hat. For this one you want to glue the tabs of the band to the back (whatever side looks the worse) of the felt covered band.

Step 5: Decoration


Yay! You should have a basic black hat. Take this moment to pat yourself on the back, you deserve it.

On Mary's hat, she has white daisies and red berries. But since I made mine with items that I had at my studio, it wasn't going to be an exact replica of her hat. I just used dollar store flowers and painted some red to create the illusion of berries.

Also at this point, I added in my comb to the back of my hat. You don't have to use a comb if you don't have one laying around. I was able to bobby pin the back of the hat to my french twist and it lasted all night long.


Not bad for throwing it together in a few hours. How did yours turn out? I would love to see your version in the comments!


For an upcoming Mary Poppins costume, I need a red bow-tie. Do you know how hard it is to find a inexpensive red bow-tie? It ain't easy. So I decided to make one on my own. I found a pattern on the internet and spent about an hour making it. Here are the steps that I followed on my journey to make a bow-tie.

Based on a pattern from www.tie-a-tie.net

Tools:
Sewing Machine
Iron and Ironing Board
1/4 Red Fabric
1/4 Interfacing, I used webbed interfacing that I had on hand.
Bow tie pattern. Use Tie-a-tie's pattern here:Bow Tie Pattern

STEP 1:THE PATTERN


Print out the pattern listed above. Don't worry about scaling the image to fit the paper. Cut your pattern out and then tap the ends together. Use the black lines as measurement for how long you want your bowtie to be. Mine is 18''.


STEP 2: CUTTING AND INTERFACING


It is always a good idea to iron your fabric before placing your pattern. Do that now please... thanks! Now it is time to fold your fabric in half, then once more. This is so you can cut all 4 pieces at once. Or you can just fold once and cut out the pattern twice.


Repeat the process with the interfacing.  This time only fold once since you just need two pieces of interfacing.


Now it is time to pin the glue side of the interfacing to the wrong side of your fabric. Follow the instructions of your interfacing for application.

STEP 3: SEWING


Now you should have 4 pattern pieces, 2 with the interfacing and 2 without. Take two of the matching pieces (I started with the two pieces that had the interfacing) and sew the two right ends together leaving 1/4 seam allowance. Repeat the process with the other two pieces.


If all is correct, you should have two long pieces. Pin the two right sides together with the backside facing up.

Using a 1/4 sewing allowance, sew around the edges of the bowtie. Just remember to leave a gap toward the middle of the bowtie so that you can turn it inside out when you have finished.


STEP 4: FINISHING UP


Clip the corners of your bowtie to make it your bow have sharp points. Now it is time to turn your bowtie inside out. I used a woden dowel to help me push the bowtie out. You could use a paint brush or a pencil that you have lying around.

Bring out your old friend, the iron. Make your bowtie nice and crisp before you close it up.


Next it is time to close up your bow tie. Turn in the raw edges and sew it close.


Voila! You have your very own bow tie.

Remember, bow ties are cool. ;)